Natural dyeing might be one of the most misunderstood practices in modern fiber arts.
Often, when people think of yarn or fabric that has been naturally dyed, they think of a limited color palette that fades with time or, worse, has its color disappear entirely in the wash. The idea that natural dyes can’t or won’t stand the test of time is prevalent — and it’s also not true.
Natural dyeing practices have existed across the globe for thousands of years. In India, processes for applying natural dyes to textiles have existed since at least 2500 BCE, with the results eventually becoming a prized export to European countries for hundreds of years.
And how have they held up? Let’s take a look.
First, a pashmina shawl dating from approximately 1800.

Courtesy of the V&A. Click the image to be taken to the page.
Its colors are still clear and vibrant and its design remains prominent. Despite being more than 200 years old, there is no obvious sign of fading.
But, of course, wool is a protein fiber, famous for its ability to take on color. Cellulose fibers are, by contrast, somewhat more difficult — so let’s see how cotton stands up.

Courtesy of the V&A. Click the image to be taken to the page.
This example is a cotton floor spread dating to about 1650, according to the Victoria and Albert Museum. As a “summer carpet,” it would have seen regular use as a floor covering and large-scale sitting mat in a palace. It would have been subject to light, abrasion, and all of the usual indignities of use — yet it too remains vibrant, even after nearly 400 years.
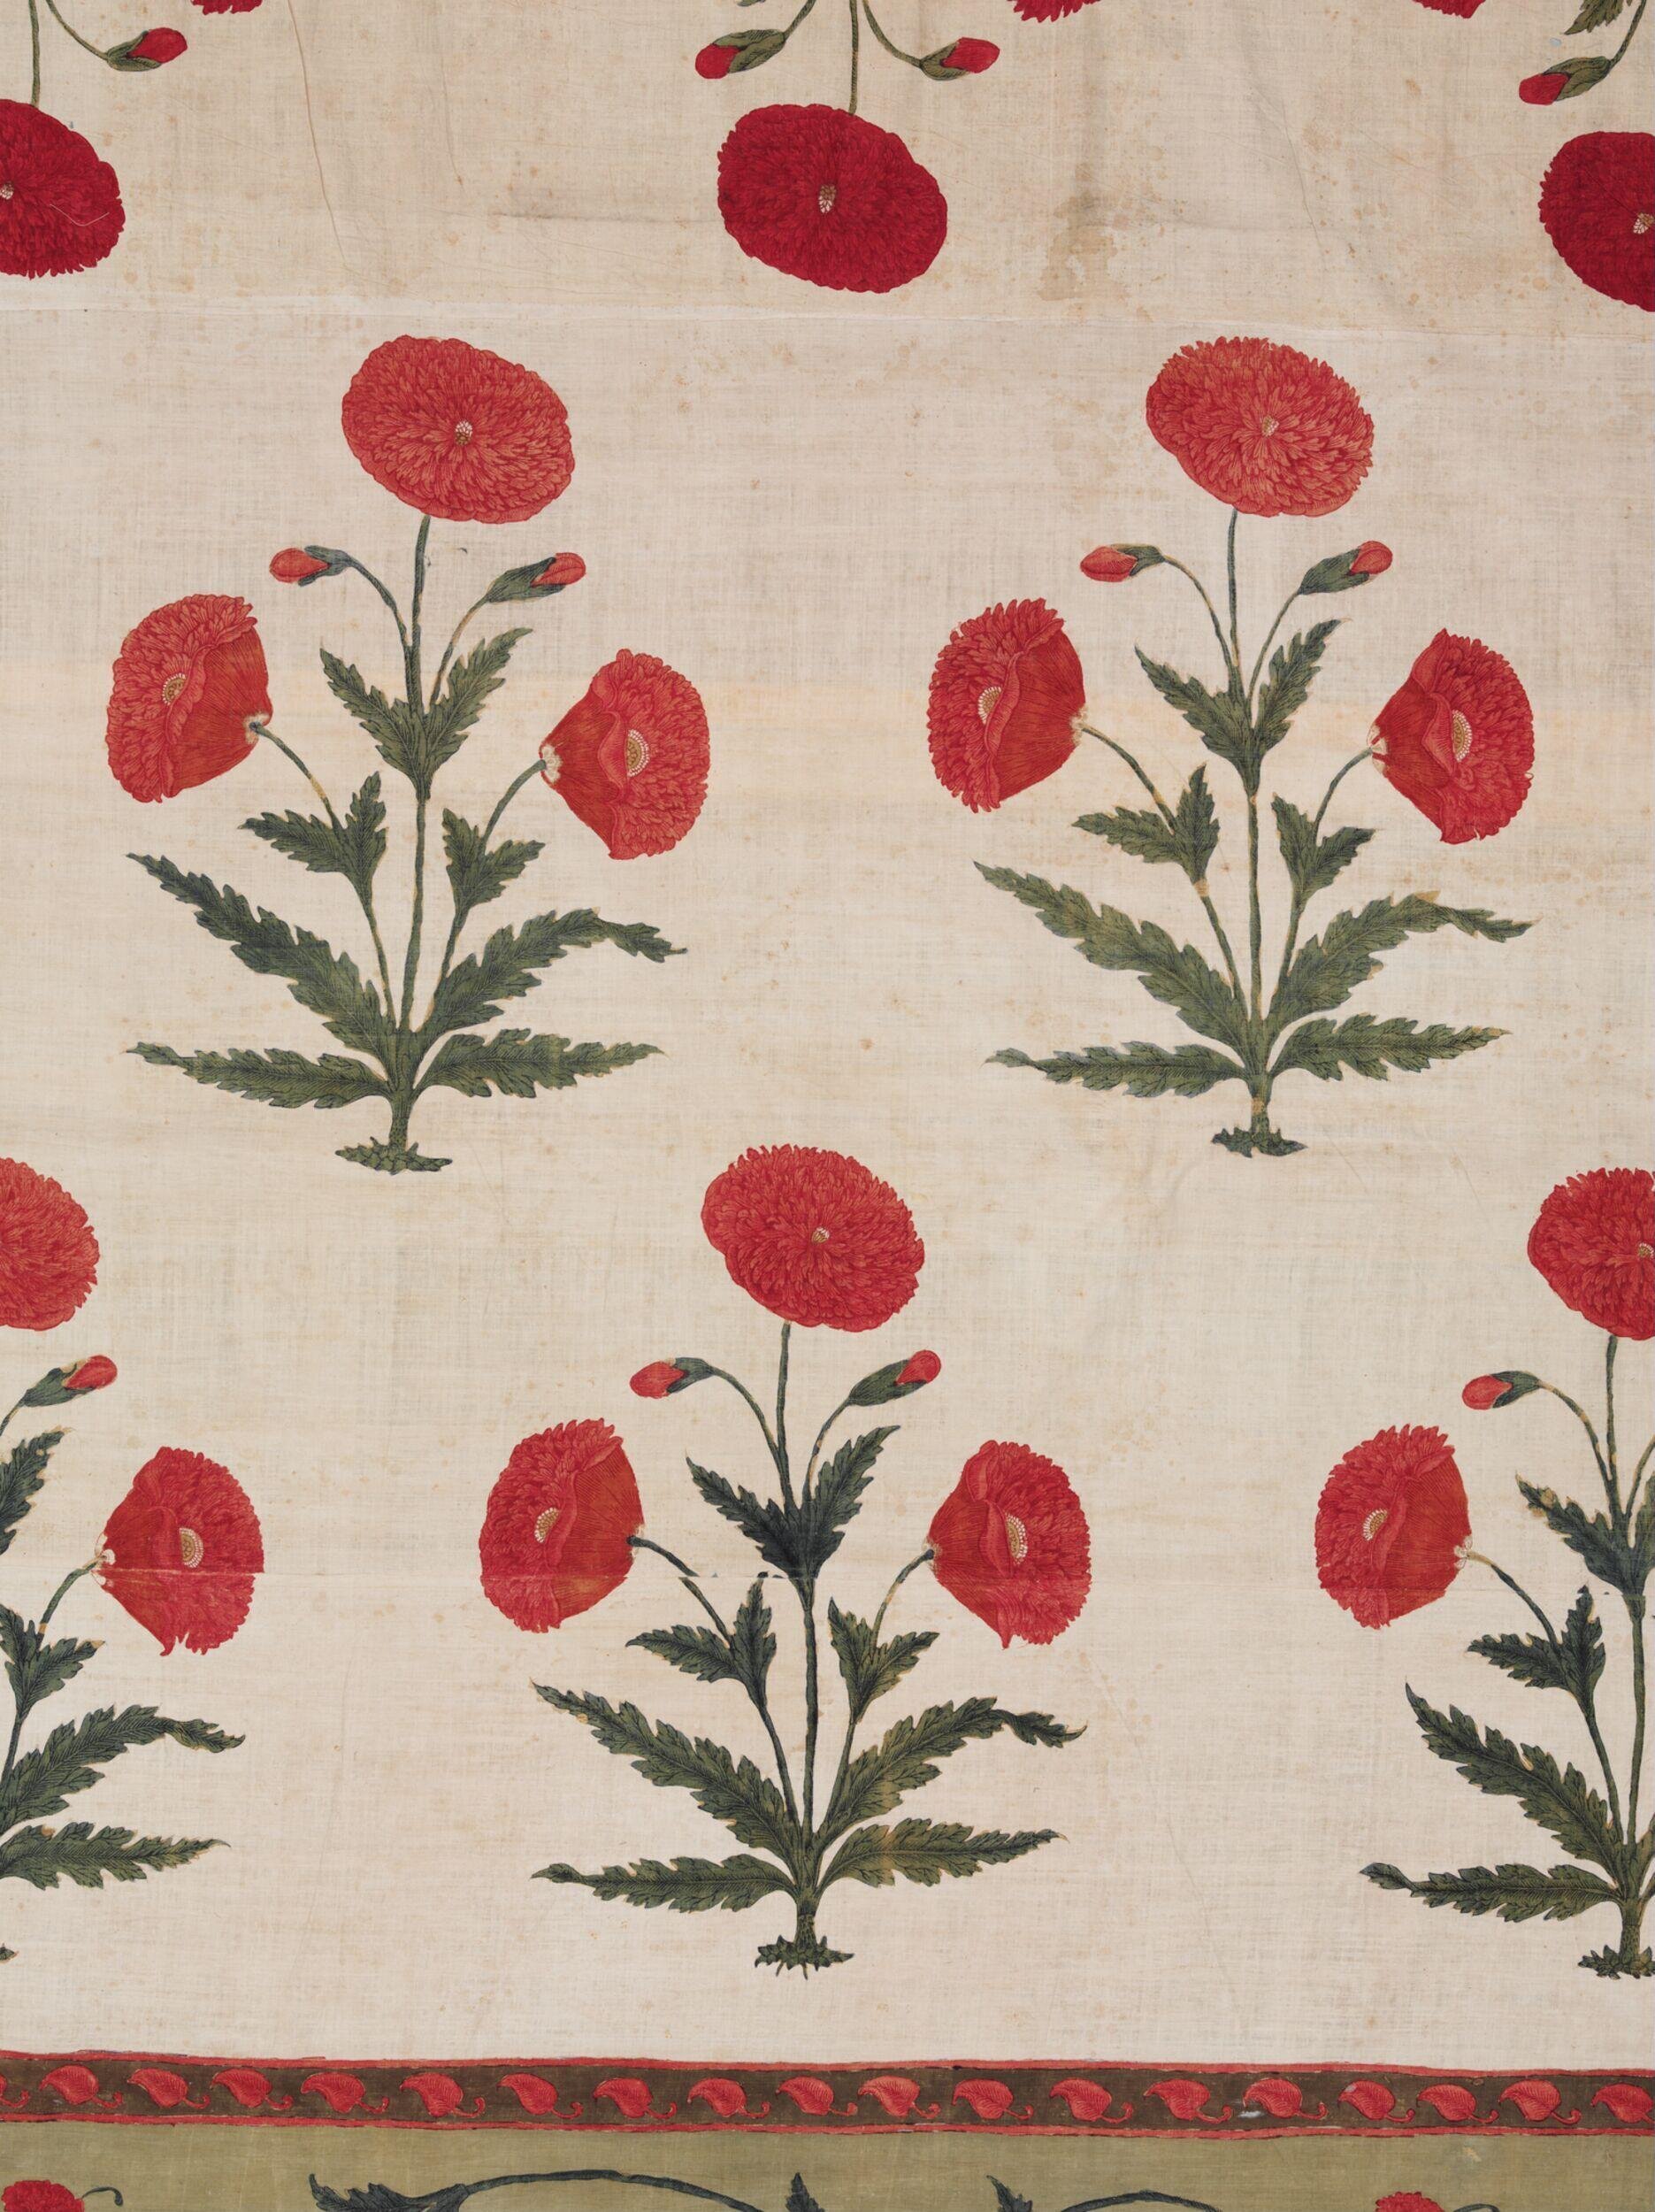
Courtesy of the V&A. Click the image to be taken to the page.
Finally, we have a fabric panel, manufactured between 1680-1700. While we don’t know what this panel was used for, we do know it is naturally dyed, made for the export market, and shows little fade, vibrant colors, and a detailed design that has been well-preserved.

Courtesy of the V&A. Click the image to be taken to the page.
But how can we prove these textiles were naturally dyed? Simple. Until 1856, natural dyes were the only dyes. While William Henry Perkin’s discovery of mauveine and aniline dyes revolutionized dyeing, it did not invent it.
What about garments, though?
This close-up highlights a sleeve from a cotton dress dating to 1828. This varied palette offers a look at just some of the colors natural dyes can produce, while its placement on the sleeve, skirt, and bodice demonstrates just how well these dyes could withstand light-exposure and abrasion.

Courtesy of the V&A. Click the image to be taken to the page.
The embroidery and embellishment on the sleeve of this overdress from the 1760s make their own case for the viability of naturally-dyed textiles.

Courtesy of the V&A. Click the image to be taken to the page.
The examples go on and on. The next time you’re in a museum, take a moment to really study the textiles — and note their dates. You’ll be stunned by how many surviving examples you can find.
It’s clear that there’s nothing that makes naturally dyed textiles inherently any less lightfast or colorfast than their synthetic counterparts. The idea that these dyes won’t stand the test of time simply isn’t accurate.
So, then, why all of the horror stories?
When dyes dull, run, shift, or disappear entirely, the problem usually comes down to three culprits:
Failure to appropriately prepare the material to be dyed
Failure to finish the dyed material correctly
Failure to select an appropriate dye
Sometimes, it’s a combination.
While many substances yield color, not all of these colors are stable. They may be prone to fading with time, washing out, or changing color with exposure to sweat or raindrops. Think of it this way: you wouldn’t expect yarn dyed with Kool-Aid to retain its color through everyday use, would you? Of course not — just because Kool-Aid can color yarn, that doesn’t mean it’s meant to be used as a dye.
Process matters. Dye selection matters. The 4,000+ year history of natural dyeing is rife with information — if only we can cut through our modern myths to find it.